Getting Started
This guide will help walk you through the basic setup and use of the Essentia Data Lake Manager.
To learn more about how to create a category, see Category Rules.
Repository setup and management
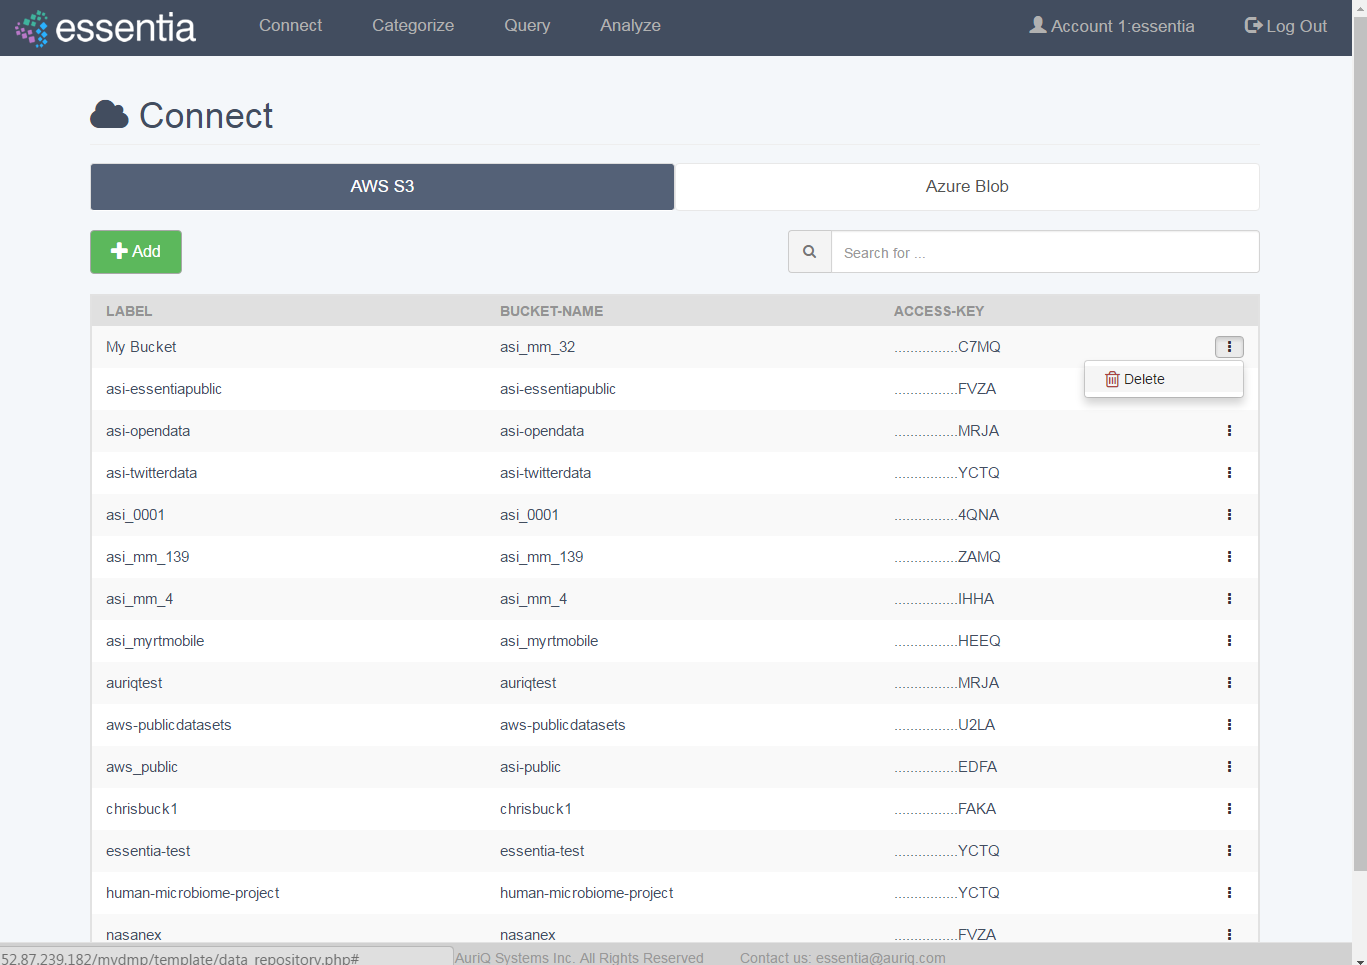
Link to AWS S3
- Click on Connect in the top menu and then the AWS S3 tab.
- Click on the +Add icon to open the input form.
- Enter your AWS S3 credentials (bucket name, access key, secret access key) and a label if you prefer to call the bucket by another name.
Note: If you are running the AWS Marketplace version of Essentia 3.1.2, you do not need to enter your AWS credentials. Instead, setup an IAM role as described in IAM Roles.
- Click on the Add button to add your S3 repository.
- Your newly added repository will be displayed in the AWS S3 table.

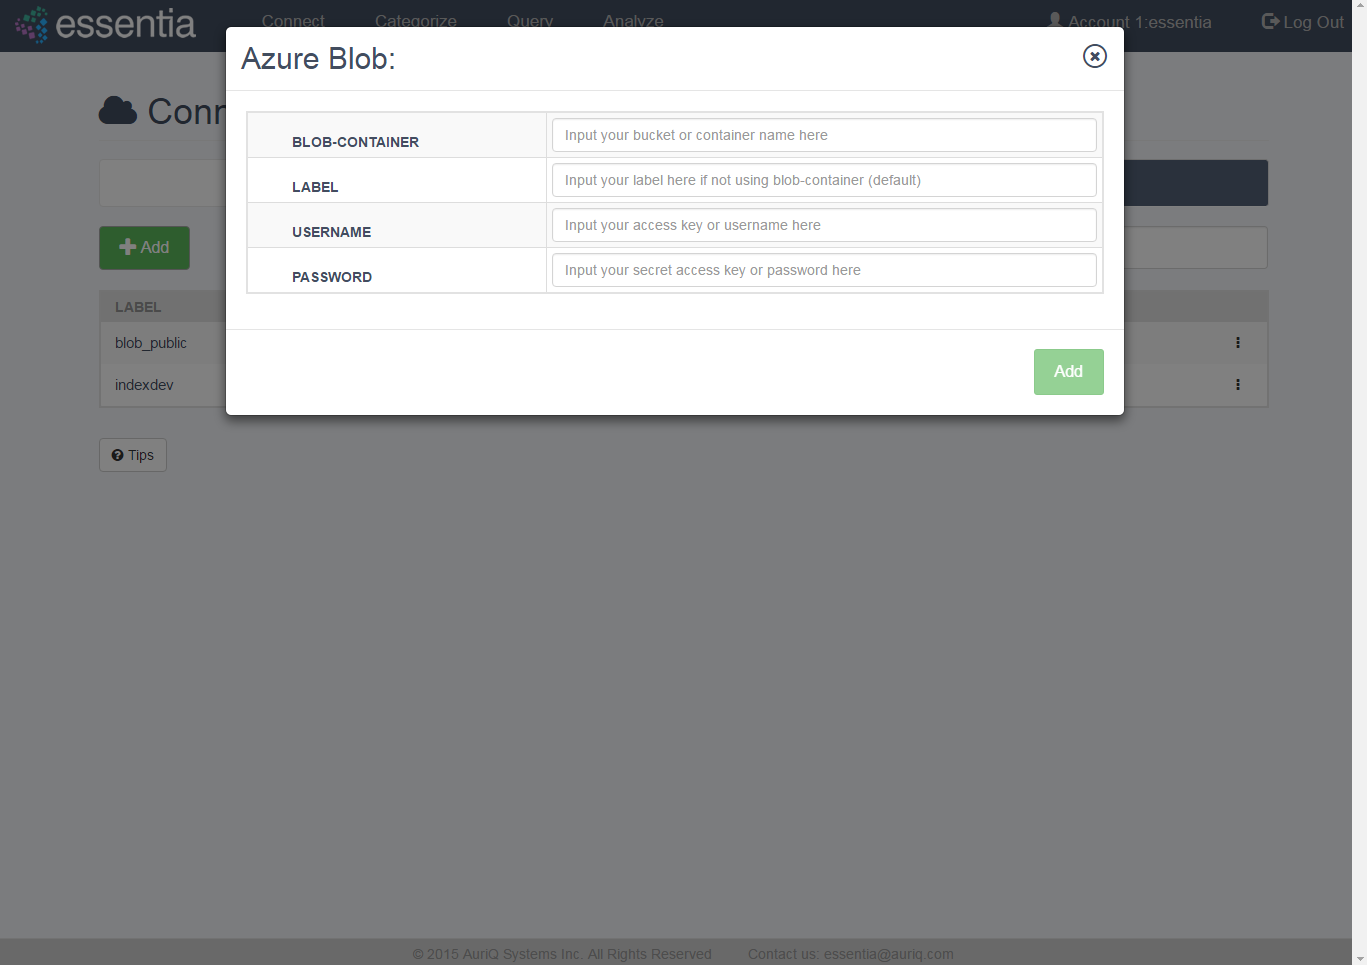
Link to Azure Blob
- Click on Connect in the top menu and then the Azure Blob tab.
- Click on the +Add icon to open the input form.
- Enter your Azure Blob credentials (container name, username, password) and a label if you prefer to call the container by another name.
- Click on the Add button to add your Blob repository.
- Your newly added repository will be displayed in the Azure Blob table.

Delete Repository
- Click on Connect in the top menu.
- Choose the appropriate tab (AWS S3 or Azure Blob).
- Click the icon on the right of the table for the repository you want to remove.
- Select the delete (trash) icon.
- Confirm to delete your setting.
Datastore category setup and management
Create category
- Click on Categorize in the top menu and select a Repository from the drop down.
- Click on the +Add icon to open the input form.
- Define your Category by entering:
- Category name - any arbitrary name (no spaces).
- Pattern - globular matching pattern(s) to describe what types of files to include in your category.
- Optionally define any number of the following options to speed up data scanning or make data management easier:
- Comment - any arbitrary comment.
- Delimiter - the type of delimiter (comma, space, tab, etc) used in your data.
- Exclude - globular matching pattern to describe what files to not include in your category. Note: this further restricts the files included by your
Pattern.
- Date Format - matching date extraction pattern found in filename structure. Specify a regular expression pattern to extract the date from your file path/name, see Date Regex.
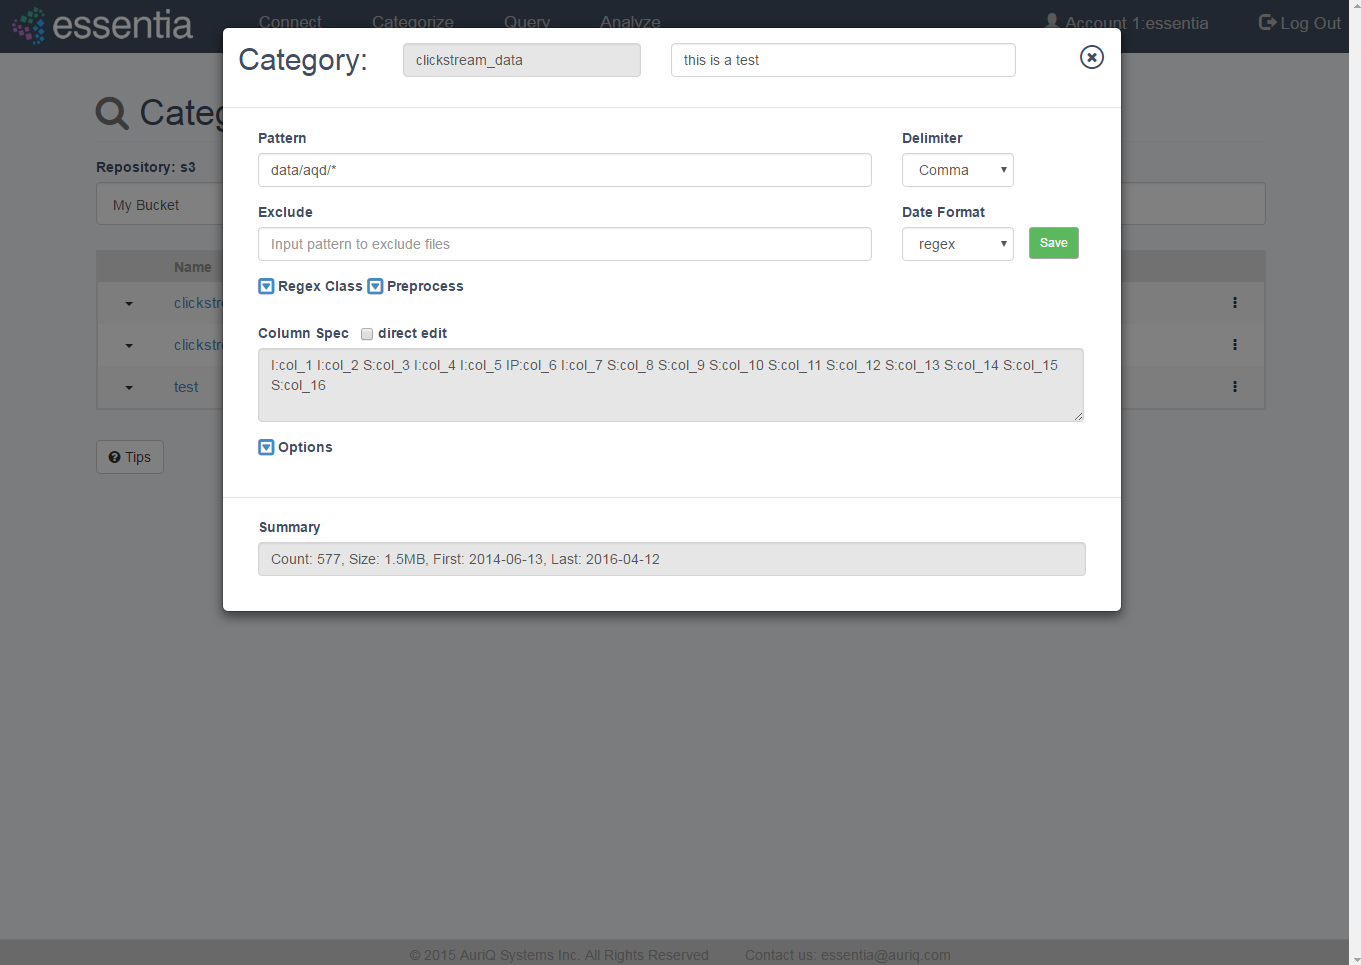
- Click on the Save button to create your category. This may take a few minutes while Essentia scans your data.
- After scan is complete, the derived column specifications will be displayed along with metadata about your files. Also, you can now Define Additional Category Options (see section 2 for more detail) or choose to Directly Edit Column Specification (see section 3 for more detail).
- Your newly added category will be displayed in the category table for the selected repository. From here you can edit, copy, scan, or delete a category, view a sample of the data or see the list of files that make up your category.
Define Additional Category Options
- Follow steps 1-5 of creating a category.
- Click on the preprocess drop down to Check or save a command to preprocess your data:
- Preprocess - command to modify your raw data before it is scanned by Essentia.
- Or click on the options drop down arrow to display category options and define either of the following options:
- Archive - matching pattern to describe filenames within a compressed file.
- Use cached file list - reference the local file list for the current category instead of accessing the repository.
Directly Edit Column Specification
- Follow steps 1-5 of creating a category.
- Click on the Direct Edit checkbox to allow the current column spec to be edited.
- From here, you can change column headers (no spaces) and assign data types in case the scan was not correct.
- Click on the Save button to save your changes.
Exploring Your Data Repository
- Click Explore.
- Click the + next to a directory to navigate through the directories on your Repository.
- Your current path is displayed at the top, under your repository name. This is useful when defining a pattern for the files you want to group into a category.
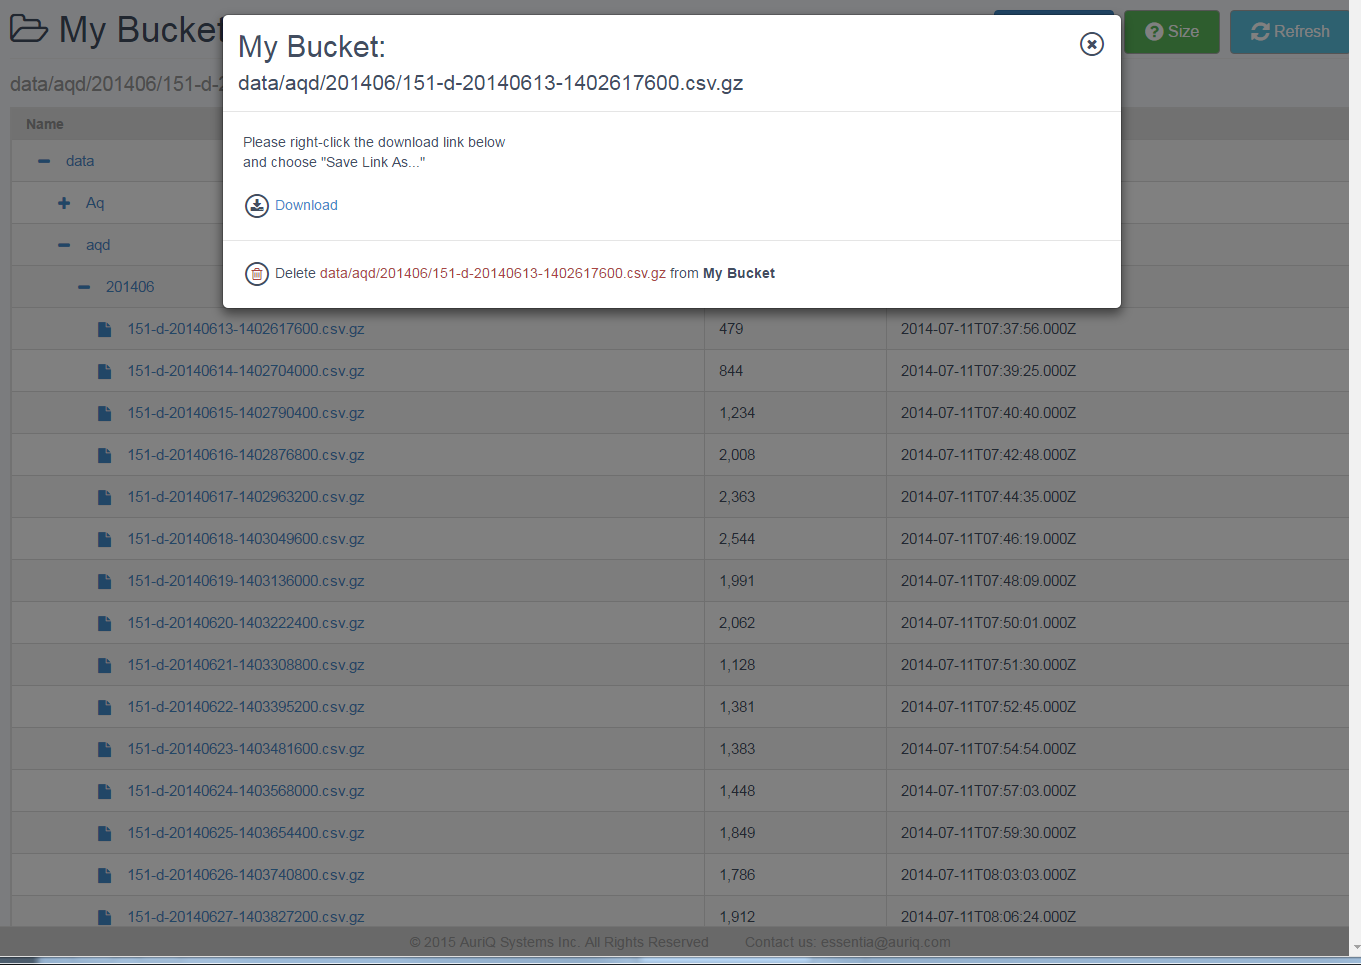
- You can click the icon next to any filename to Download or Delete that file from your Repository.

You can click Upload to choose files to upload to the current path on your Repository.
You can click Size to calculate the total number of files and bytes in the current path on your Repository.
You can click Refresh to get the latest list of files on your Repository.
Note: If the Explorer tab does not open when you click Explore, you may need to enable pop-ups from the Essentia UI.
Query setup and management
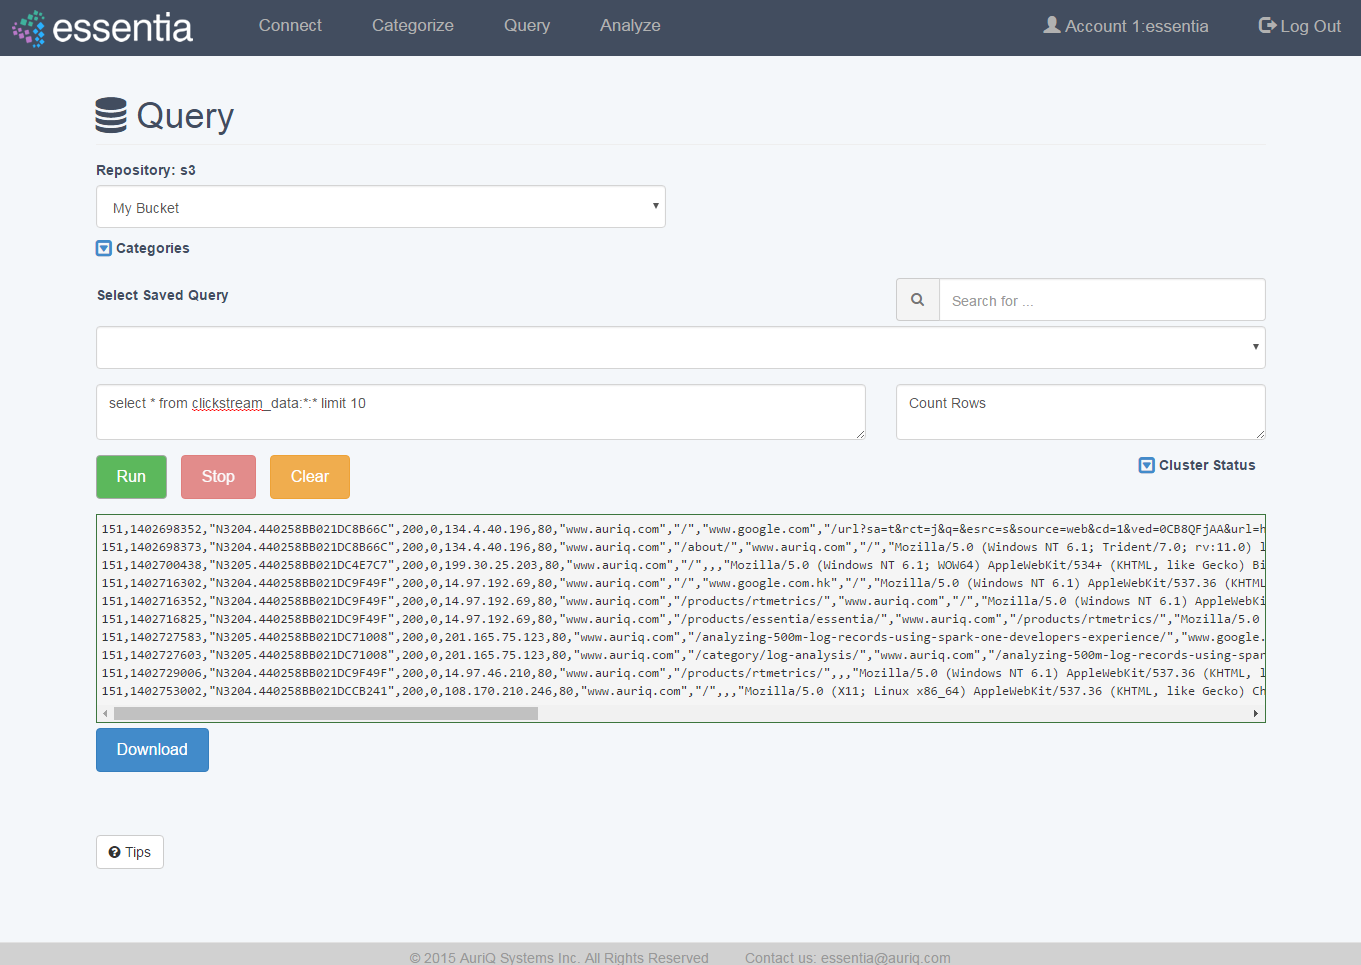
Create a Query
- Click on Query in the top menu and and select a Repository from the drop down
- Enter your SQL like query in the Input your query here area. You can optionally enter a label for this query so you can reference it later.
- Click on the Run button to view your query results on your screen and then optionally download your query results into a file on your computer by clicking Download and entering a filename.
- If you do not need the results of your query anymore, you can click Clear to delete those results.
- From this point you can access a saved query or run a new query. Running another query will clear the previous query’s results.

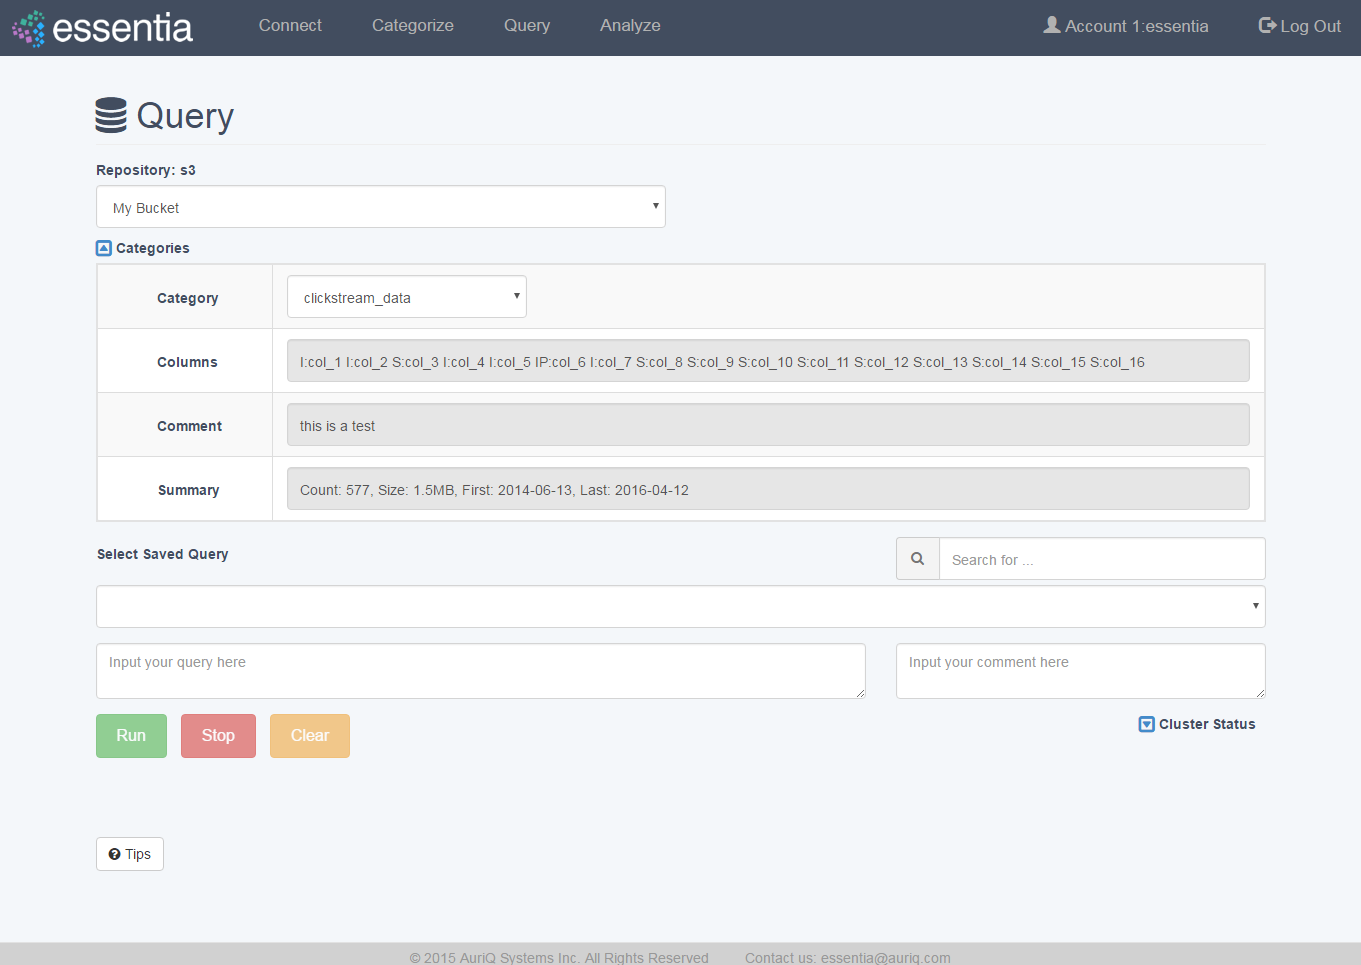
Note: If you need to view available categories, click on the Categories drop down arrow to view a list of available categories.

Query Format
select [column_name] | [*] from [category_name]:[start_date | *]:[end_date | *] where ... order by ... limit ...

select count(distinct [column_name] | [*]) from [category_name]:[start_date | *]:[end_date | *]  where ...

select [column_name], count(*) from [category_name]:[start_date | *]:[end_date | *]  where ... group by [column_name]
Rules
The first query format above is a "select" query.
The second and third query formats above are "count" queries.

1. Group By is NOT supported for SELECT queries.
2. Order By is NOT supported for COUNT queries.
3. Limit is NOT supported for COUNT queries.
4. Group By can only be used when there is no DISTINCT in COUNT queries.
Example
select * from myfavoritedata:*:* where payment >= 50
select * from purchase:2014-09-01:2014-09-15 where articleID>=46 limit 10
To see more examples of the types of queries we allow and work with some sample queries of our public data, please go through our Query Examples
Working with Saved Queries
- Select your Saved Query from the dropdown. The query should appear in the “Input your query here” area. If you labeled your query, the label should appear next to the saved query dropdown.
- Now you can click the Run button to view your query results on your screen and then optionally download your query results into a file on your computer by clicking Download and entering a filename.
You can search your saved queries by entering any parts of your desired queries into the Search box.
Script setup and management
Run a Script
- Click on Analyze in the top menu.
- Select a Github Repository from the drop down menu or use the Default (DirectScipt - auriq).
- Enter your Essentia or unix shell commands in the Input your script here area. You can optionally select one of the files from your Github Repository to edit or run. To do this, click the file icon to the left of the filename.
- Click on the Run button to view your script’s results on your screen.
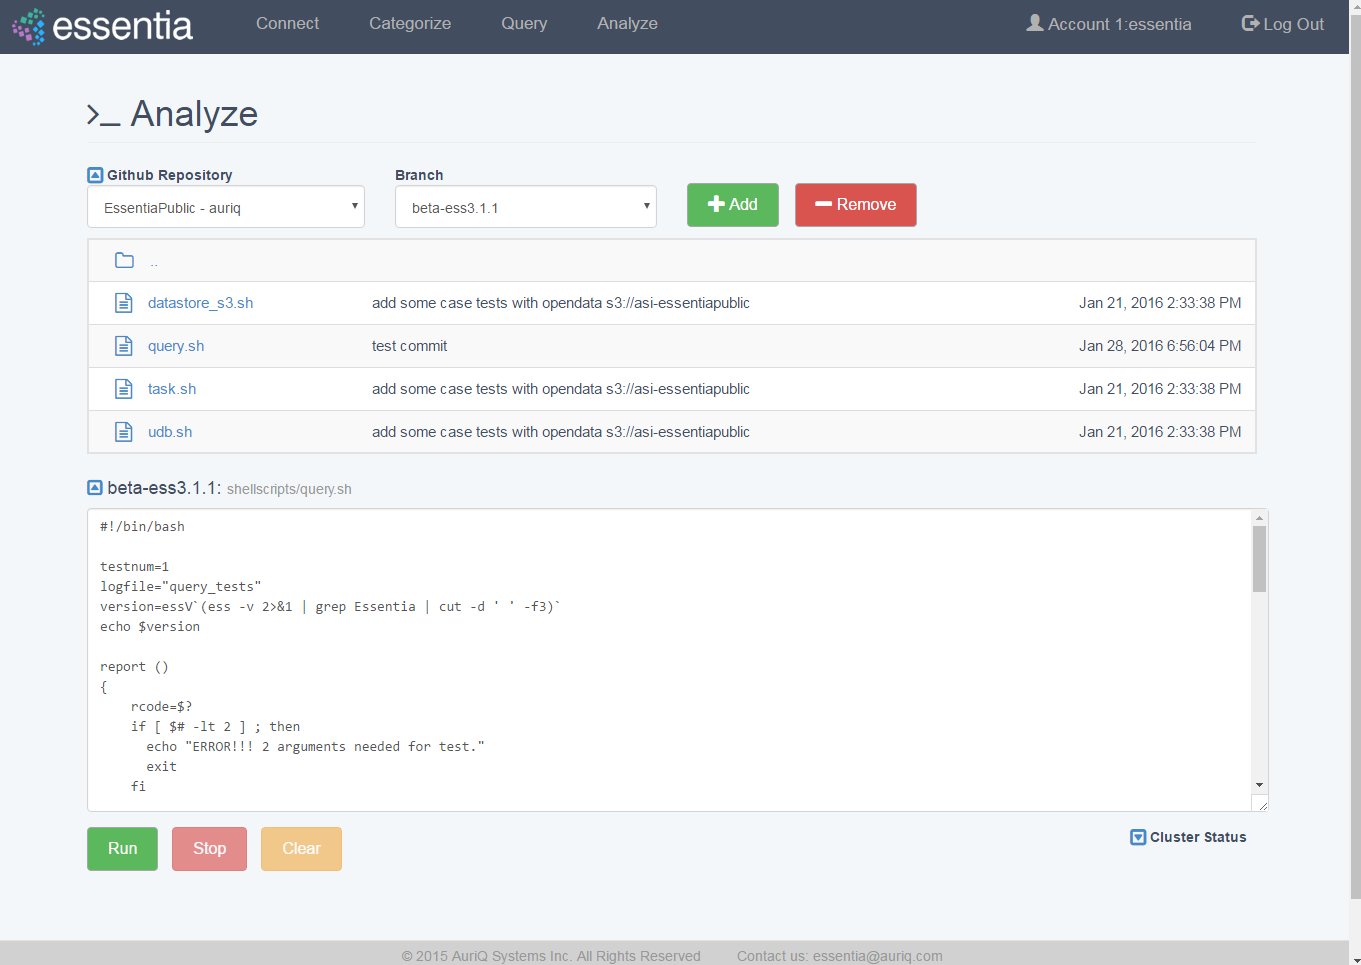
Note: You can also Stop running your script or, when it has finished, Download the result onto your local machine or Clear the results so they are no longer stored. You must terminate any worker cluster before running Clear or you will have to terminate those nodes manually (without Essentia).

Note: You can also view the status of your master computer and any other machines you are utilizing by clicking on Cluster Status. This will show you the connection information and resource usage of each connected machine.
Connect to a Github Repository
- Click on Analyze in the top menu.
- Click the Add button.
- Enter the Owner of your Github Repository, the name of your Repository, and your Personal Access Token. If you do not have a Personal Access Token, follow the instructions found here.
- Click on the Save button to finish adding your Github Repository.
- From this point you can view, edit, and run any of the scripts stored in the Github Repository.
Note: To view or switch between available Github Repositories or Branches, click on the Github Repository or Branch drop down menus.
Questions
Our tutorials are intended to guide you through the usage of the included tools, but you should feel free to contact us at essentia@auriq.com with any other questions.